Installation and Setup Guide for Visual Studio Code
Visual Studio Code (VS Code) is a lightweight, powerful code editor ideal for frontend development and documentation projects. This guide will help you install VS Code and configure it for optimal productivity.
Step 1: Install Visual Studio Code
macOS
- Go to the VS Code download page.
- Download the macOS version (
Universalfor Apple Silicon and Intel). - Open the
.dmgfile and drag the VS Code application to your Applications folder. - Launch VS Code from Applications or Spotlight.
Windows
- Go to the VS Code download page.
- Download the Windows installer (
User InstallerorSystem Installerfor admin privileges). - Run the installer and follow the on-screen instructions.
- Open VS Code from the Start Menu or Desktop shortcut.
Step 2: Install Extensions for Frontend Development
Recommended Extensions
-
JavaScript/TypeScript
- Extension: ESLint
- Extension: Prettier - Code Formatter
-
Documentation
- Extension: markdownlint
-
Diagram Creation
- Extension: Draw.io Integration
- Use this extension to create and edit diagrams directly within VS Code.
- Extension: Markdown Preview Mermaid Support
- This extension enables rendering of Mermaid diagrams in Markdown preview.
- Extension: Draw.io Integration
-
GitHub Copilot
- Extension: GitHub Copilot
- AI-powered code completion and suggestions.
- Extension: GitHub Copilot Chat
- AI-powered conversational assistant for coding.
- Extension: GitHub Copilot
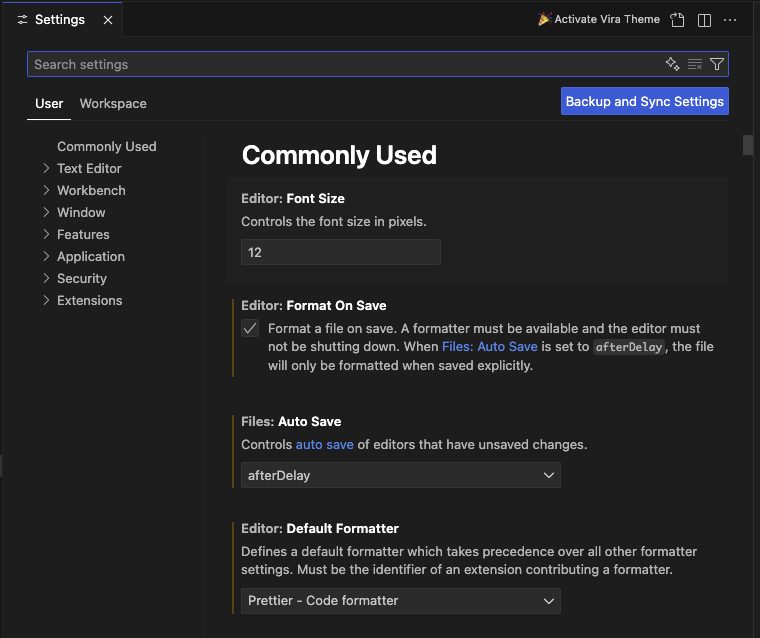
Step 3: Configure VS Code Settings
Frontend Development Settings
- Open VS Code.
- Go to File > Preferences > Settings (or use
Ctrl + ,on Windows orCmd + ,on macOS). - Add or modify the following settings:
Step 4: Customize Themes and Icons
Recommended Themes
- Install Github Theme.
Recommended Icon Pack
- Install VSCode Icons.
By following these steps, your VS Code setup will be optimized for frontend and documentation projects!